Klaviyo AI Segmentation Abandoned Cart Recovery Setup
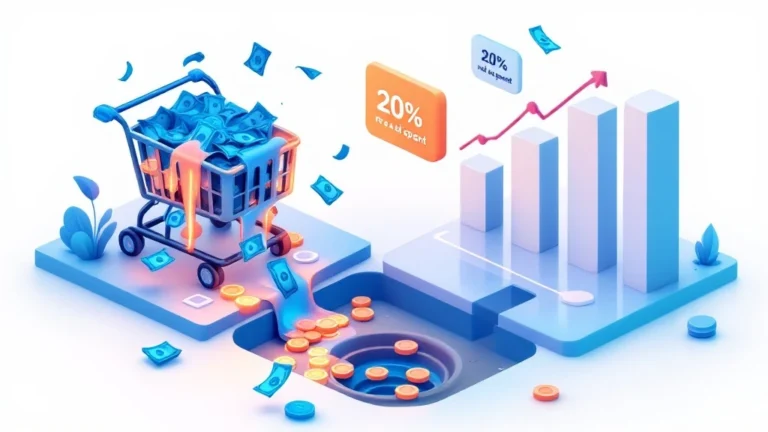
Klaviyo AI segmentation abandoned cart recovery starts with predicted spend and churn risk, not just what’s sitting in the cart. About 70.22 percent of online carts get abandoned on average, a figure calculated across 50 studies by the Baymard Institute (updated September 22, 2025). As a result, almost every store already runs some kind of abandoned cart flow, usually a simple three-email sequence sent to every abandoner without exception. However, almost none of them treat a repeat $2,000-a-year customer differently than a browser who has never placed an order, even though Klaviyo has the data to tell them apart automatically. In fact, that gap is exactly what this setup fixes, and it’s the difference between an email that converts and one that just gets ignored or, worse, trains a loyal customer to expect a discount every time they shop.
The logic behind this layer is simple. Specifically, a generic discount trains your best customers to wait for one, while a generic reminder does nothing for a customer who was already about to churn. Here’s exactly how to configure Klaviyo’s AI segmentation fields for a $500K to $5M ARR Shopify store. By the end, your abandoned cart flow will treat a high-value repeat buyer differently than a first-time visitor, and it will do so automatically.
This is a deeper, platform-specific follow-on to my colleague’s general guide to reducing cart abandonment on Shopify with AI, which covers the standard three-email Klaviyo flow. If you don’t have that base flow built yet, start there first. Then, come back here to layer AI segmentation on top of it.
Key Takeaways
- Klaviyo’s predictive analytics need at least 500 customers with completed orders and 180 days of order history before the AI fields activate, per Klaviyo’s documentation (updated August 5, 2025).
- The five usable predictive fields are predicted CLV, historic CLV, total CLV, churn risk (scored 0 to 1), and average time between orders.
- Route high predicted-CLV abandoners to a no-discount urgency branch. Route high churn-risk abandoners to a faster, stronger incentive instead.
- First-time visitors with no order history sit outside the predictive model. Segment them on order count, not CLV.
What You Need Before You Start
- A Klaviyo account with Shopify (or another supported platform) syncing Placed Order events.
- At least 500 customers with completed orders and 180 days of order history. Below that, the predictive analytics panel shows “not enough data yet.”
- An existing abandoned cart flow already live. This guide adds a routing layer on top of it, not a replacement for it.
- Admin access to Klaviyo’s Segments and Flows sections.
- About 45 to 60 minutes for setup, plus a week of monitoring before you trust the results.
Difficulty: Intermediate. No code required, but you’ll need comfort with Klaviyo’s flow-builder conditional splits.
What You’re Building
By the end of this setup, one abandoned-cart trigger feeds three or four different branches instead of one generic sequence. Specifically, a shopper who abandons a cart gets routed first by whether they have order history at all. From there, predicted value and churn risk decide which message they actually see.
What it does:
- Separates first-time abandoners from repeat customers automatically.
- Sends a no-discount urgency message to your highest predicted-value shoppers.
- Sends a faster, stronger incentive to shoppers flagged as high churn risk.
- Skips the discount entirely for shoppers who were already due to reorder.
Why build this at all? Because treating every abandoner the same wastes your best lever twice: it discounts customers who would have bought anyway, and it under-serves the ones about to leave for good.
Klaviyo AI Segmentation Abandoned Cart Setup: Step by Step
Step 1: Confirm Your Account Meets the Data Threshold
Before you build anything, check whether Klaviyo’s predictive analytics are actually live on your account. Open a customer profile in Klaviyo and look for the Predictive Analytics panel. If it shows real numbers instead of “not enough data yet,” you’re clear to continue.
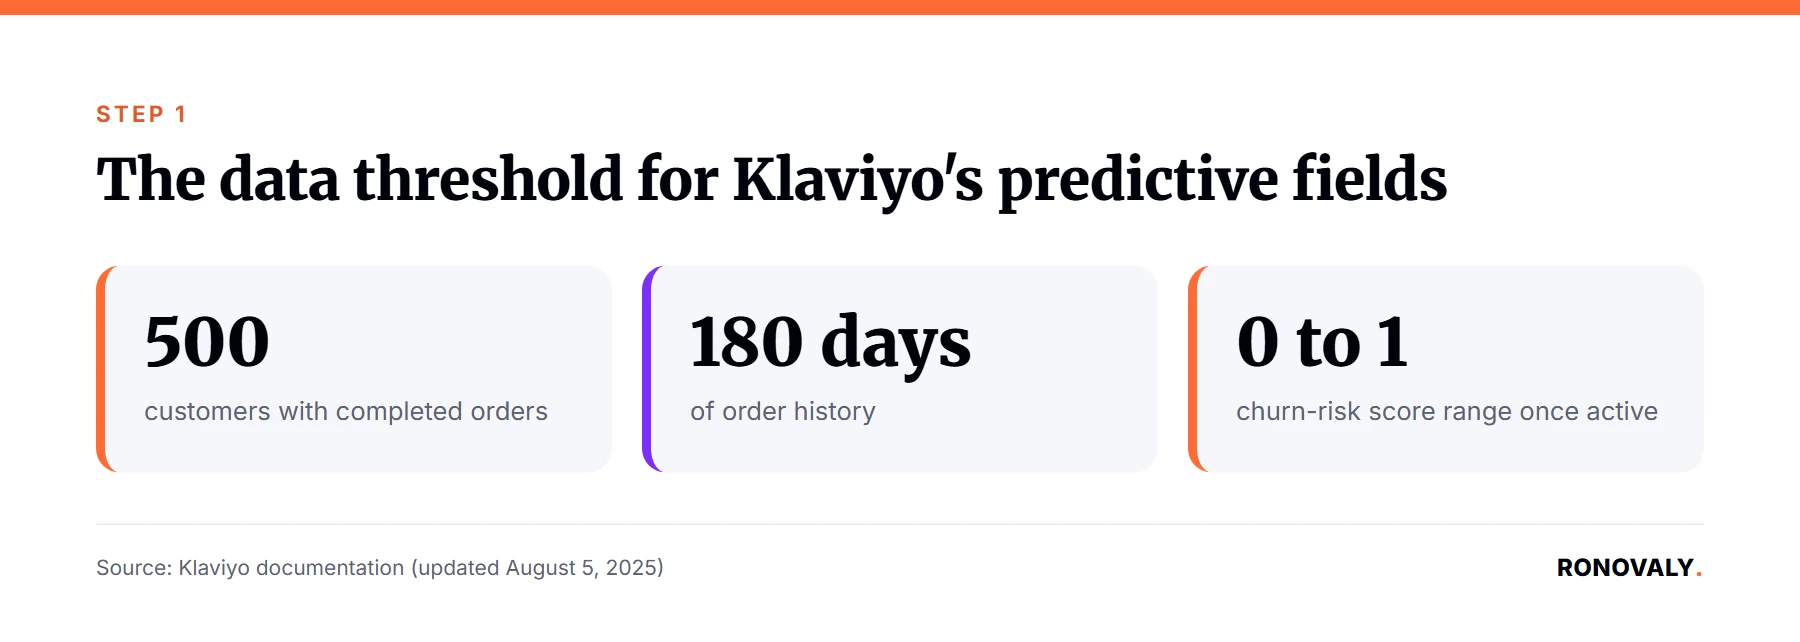
Predicted CLV is Klaviyo’s forecast of how much a customer will spend over the next twelve months. It’s one of five fields that only populate once your account clears a specific threshold. Specifically, Klaviyo requires 500 or more customers with completed orders and 180 days of order history. It also needs an order in the last 30 days, plus some customers with three or more orders, per Klaviyo’s Help Center (updated August 5, 2025). Therefore, a newer or smaller store won’t have this layer yet, and that’s fine. Build your flow on standard behavioral segments meanwhile, then add this layer once you cross the threshold.
Watch out: predictive fields don’t populate until your store meets Klaviyo’s data threshold, so building segments on them earlier can waste an afternoon. Check the panel first. It takes thirty seconds and saves the whole session.
Step 2: Build Your Predictive Segments
This step creates the actual AI segmentation, and it’s where most of the value sits. In Klaviyo, go to Segments, create a new segment, and use the “Predictive analytics about someone” condition. Notably, this single condition exposes all five predictive fields, according to Klaviyo’s CLV segmentation guide (updated August 6, 2025).
Churn risk is a probability score from 0 to 1 that estimates how likely a customer is to stop buying. For example, a score of 0.45 means a 45 percent estimated chance of churn. Historic CLV, in contrast, is the total value of a customer’s past orders, while total CLV adds historic and predicted CLV together for a single number.
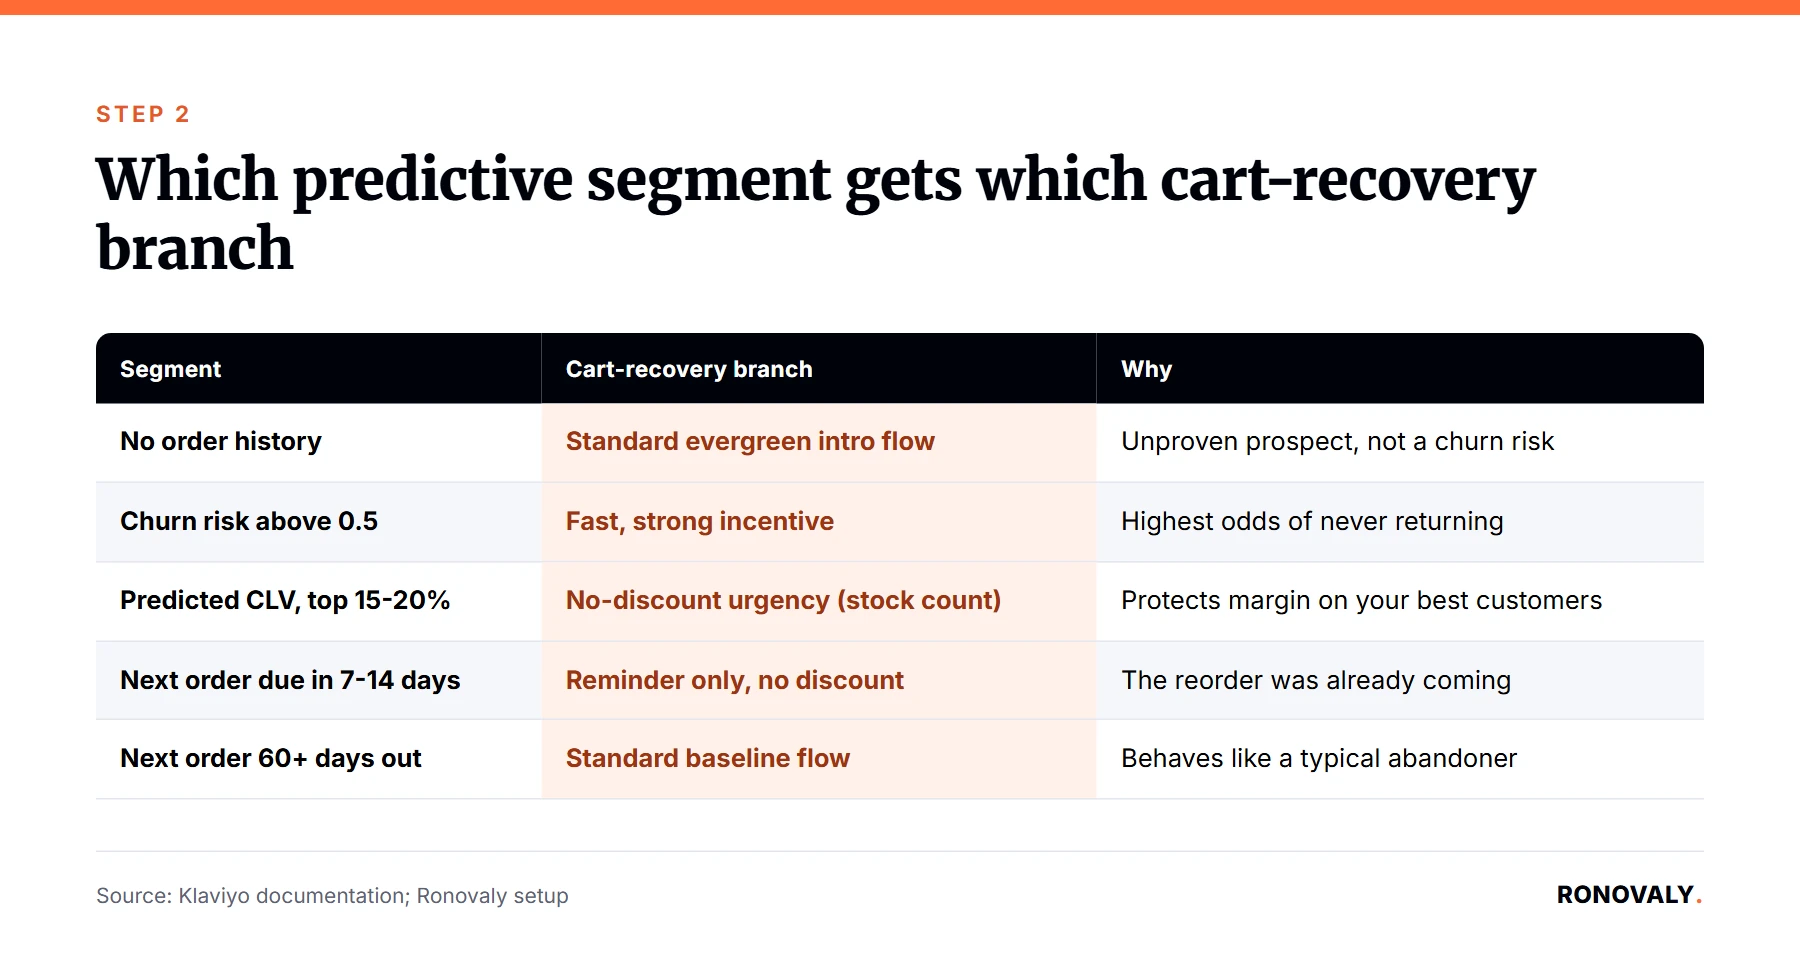
Here’s the reference table for deciding which field drives which segment. I built it by mapping Klaviyo’s documented predictive fields to flow branches, since no single vendor page lays it out quite this way.
| Predictive field | Segment condition | Cart-recovery branch | Why |
|---|---|---|---|
| Predicted CLV, top 15-20% | Predicted CLV above your threshold | No-discount urgency (scarcity, stock count) | Protects margin on your best customers |
| Churn risk above 0.5 | Churn risk above 0.5, plus cart abandoned | Fast, strong incentive (percent off or free shipping) | Highest odds of never returning |
| Historic CLV = $0 | Placed Order zero times | Standard evergreen intro flow | Unproven prospect, not yet a churn risk |
A second pair of conditions, in addition to the first, handles timing instead of value. Consider a customer who is right on schedule to reorder versus one who abandoned well off cycle. Those two shoppers, notably, need different messages entirely.
| Predictive field | Segment condition | Cart-recovery branch | Why |
|---|---|---|---|
| Expected next order within 7-14 days | Expected date of next order | Reminder only, no discount | Reorder was already coming |
| Expected next order 60+ days out | Same condition, inverse threshold | Your standard baseline flow | Behaves like a typical abandoner |
Watch out: churn risk and predicted CLV can disagree. Specifically, a customer can be high-value AND high-risk at once, someone who spends a lot but hasn’t ordered in months. When both match, I default to the churn-risk branch. In fact, a customer you’re about to lose is worth more urgency than one who’s simply valuable but stable.
Step 3: Route the Abandoned Cart Flow by Segment
With your segments built, open your existing abandoned cart flow and add a conditional split right after the trigger. Route each branch based on segment membership, checked in this order: no order history first, then churn risk, then predicted CLV, then expected next order date. Order matters here, since a profile can technically qualify for more than one segment, and you want the most urgent signal to win.
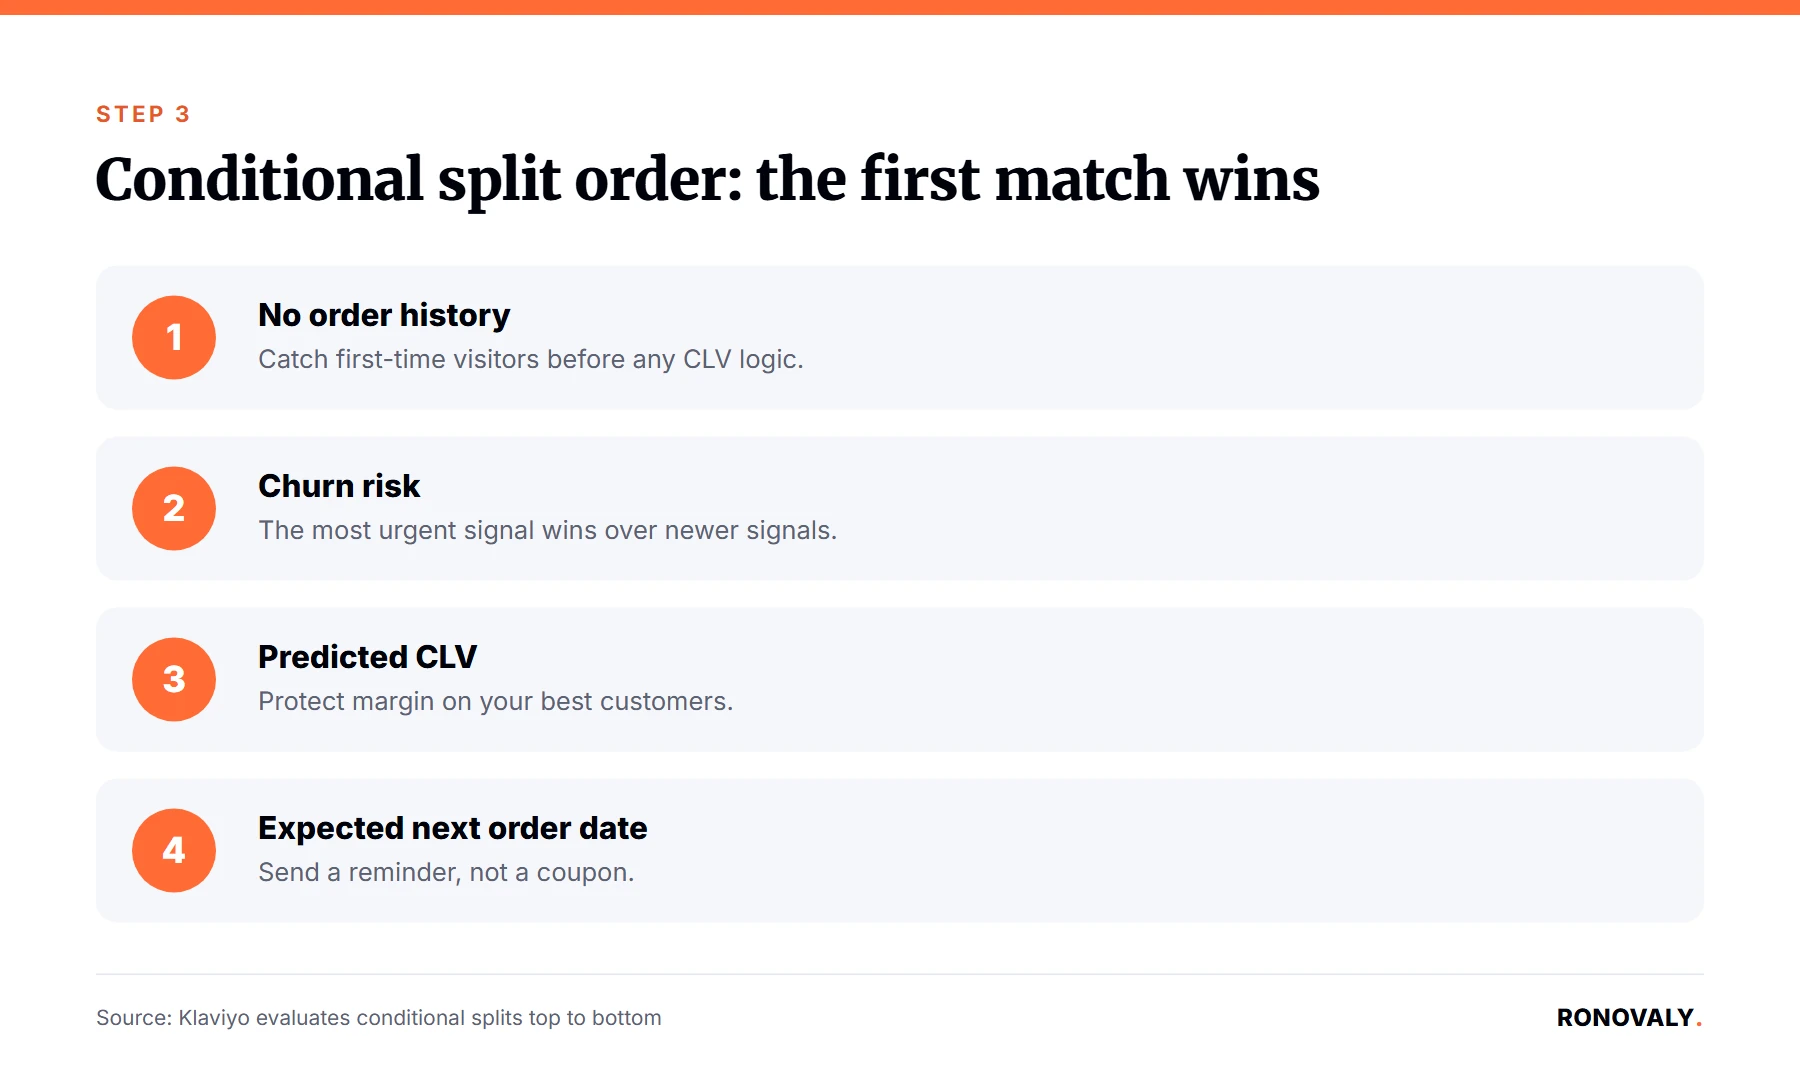
For example, a repeat customer with both a high churn-risk score and a cart sitting untouched for six hours should hit the churn-risk branch, not get lost behind newer signups. The order matters because Klaviyo evaluates conditional splits top to bottom and the first match wins. Have you checked which of your own segments could overlap? If not, that’s the first thing to test before this goes live.
Expected output: sending a test trigger from four different test profiles, one per segment, should land each one in a different branch with a different message. If two land in the same branch, tighten your segment thresholds.
Step 4: Write the Message for Each Branch
Each branch needs its own subject line and offer, not just a different tag on the same template. For the no-discount urgency branch, a countdown or a stock-level callout, such as “3 left in your size,” fits the goal better than any dollar figure. In contrast, the churn-risk branch is the only one where I lead with a real incentive in the subject line itself, since speed and clarity matter more than subtlety when you’re trying to stop someone from leaving for good.
Keep the reminder-only branch simple: a product photo, the item name, and a link back to checkout. Adding a discount here doesn’t just cost margin, however. It can also train an already-loyal customer to hesitate on future orders while they wait to see if a coupon shows up. Why give away margin on a sale that was already coming?
Step 5: Test Every Branch Before You Turn It Live
Before you activate the split flow, create four test profiles matching each segment’s conditions. Specifically, import test order histories if you need to simulate CLV or churn risk. Then, send a test trigger through each profile and confirm it lands in the branch you expect.
Manual verification checklist:
- High predicted-CLV test profile received the no-discount urgency message.
- High churn-risk test profile received the faster, stronger incentive.
- Zero-order test profile received the standard intro flow, not a predictive branch.
- Near-term expected-order test profile received the reminder-only message.
- No test profile landed in more than one branch.
This step, notably, catches the overlap issue from Step 3 before a real customer sees the wrong message. Skipping it is the single most common mistake I see when a founder builds this alone for the first time.
Common Mistakes to Avoid
Building predictive segments before checking the data threshold. If your account isn’t at 500 customers and 180 days of history yet, the segments sit empty. Therefore, confirm the panel shows real data first.
Discounting your highest predicted-CLV customers by default. This is the mistake I fix most often. Specifically, a blanket 15 percent off in every abandoned cart email trains your best customers to expect one, permanently.
Ignoring the order in which conditions get checked. If churn risk and predicted CLV can both match, decide which one wins before you build the flow, not after a customer gets two conflicting emails.
Treating first-time abandoners like churned customers. A profile with zero prior orders doesn’t have a churn risk score to act on yet. As a result, segment them on order count instead.
What a Working Setup Looks Like
Once this is live, your abandoned cart flow should send at least three visibly different messages depending on who abandoned. In fact, if every abandoner still gets the identical email regardless of history, the segmentation layer isn’t routing traffic yet, and Step 3 is worth rechecking. What should you actually expect once it is routing correctly? A measurable gap between your best-performing branch and your flow’s overall average.
Over the following month, watch for a lift in revenue per recipient on your churn-risk and predicted-CLV branches specifically, compared to your flow’s baseline average. Klaviyo’s own benchmark data, drawn from more than 143,000 abandoned cart flows, puts the average abandoned cart flow at $3.65 revenue per recipient and a 3.33 percent placed-order rate, with top-performing brands reaching $28.89 and a 7.69 percent placed-order rate, according to Klaviyo’s benchmark report (published May 15, 2024, based on 2023 data). Your segmented branches, especially the churn-risk one, should outperform that flow-wide average once they’ve had a few weeks to collect data, since they’re targeting the shoppers most likely to respond to a well-timed nudge instead of a generic blast. If they don’t outperform after a month, revisit your thresholds before you assume the segmentation itself failed to work.
Related guides: for next steps, see how AI cancellation flows save more subscribers.
Frequently Asked Questions
What is Klaviyo AI segmentation and how is it different from a regular segment?
Klaviyo AI segmentation uses predictive fields, such as predicted CLV and churn risk, as segment conditions. A regular segment filters on what you already know, like an opened email or an item in cart. In contrast, an AI segment filters on what Klaviyo predicts will happen next.
How much order history does a store need before Klaviyo’s predictive analytics work?
You need at least 500 customers with completed orders and 180 days of order history, with an order in the last 30 days and some customers at three or more orders, per Klaviyo’s Help Center. Below that threshold, the panel shows “not enough data yet.”
Can I trigger an abandoned cart flow off churn risk or predicted CLV instead of just “added to cart”?
Not as the initial trigger, since churn risk and CLV are profile properties, not events. Instead, what you can do, and what this guide walks through, is keep “added to cart” as the trigger and add a conditional split right after it that routes based on predictive analytics.
What’s the difference between predicted CLV, historic CLV, and total CLV in Klaviyo?
Historic CLV totals a customer’s past orders to date. Predicted CLV, in contrast, forecasts their spending over the next twelve months based on their own buying pattern. Total CLV adds the two together, giving you a single number that represents value already earned plus expected future value, which makes it the natural field for VIP segment thresholds.
Does Klaviyo’s AI segmentation cost extra on top of the base email plan?
Predictive fields like predicted CLV and churn risk are included once your account meets the data threshold, with no separate add-on fee required to view or segment on them. Custom CLV time windows, however, are limited to Klaviyo’s Marketing Analytics and Advanced KDP tiers, per Klaviyo Academy’s own guidance, so check your current plan before you build a segment around a custom window specifically.
How accurate are Klaviyo’s churn risk predictions for a small or newer store?
Predictions improve with more data. Klaviyo’s churn model factors in CLV, order count, time between orders, and recency, and it won’t generate reliable scores until your account clears the 500-customer, 180-day threshold. Below that threshold, therefore, treat any prediction as directional rather than exact.
Do I need separate FAQ schema markup for this kind of post?
Not if your site runs Rank Math, which automatically generates schema.org Article and FAQ markup from a properly formatted FAQ section like this one. Hand-rolled JSON-LD isn’t necessary here, and adding it separately can actually conflict with what the plugin already generates.
Next Steps
You now have a repeatable way to route abandoned cart traffic by predicted value and churn risk instead of treating every abandoner the same. As a next step, run this setup once, watch each branch’s performance for two to four weeks, and adjust your churn-risk threshold if that branch isn’t outperforming your flow average.
If you haven’t built the baseline flow yet, start with reducing cart abandonment on Shopify using AI first. Once this layer is live, document it as a repeatable process the way I cover in SOPs for Shopify founders, so a teammate can rebuild it without you. If you’re also weighing a dedicated personalization app alongside Klaviyo, I compared two common options in Rebuy vs. LimeSpot. And if tool subscription costs are on your radar too, my colleague’s audit of hidden Shopify AI app costs covers exactly where Klaviyo’s own usage tiers can surprise you.
I’m Sarah Blake, and I write about e-commerce growth and conversion for Ronovaly. You can read more about how we test these workflows on real stores on our About page, or reach our editorial team through Contact. Every statistic in this piece is fact-checked against its named source before publish.
This post contains affiliate links. If you make a purchase through these links, we may earn a commission at no extra cost to you.